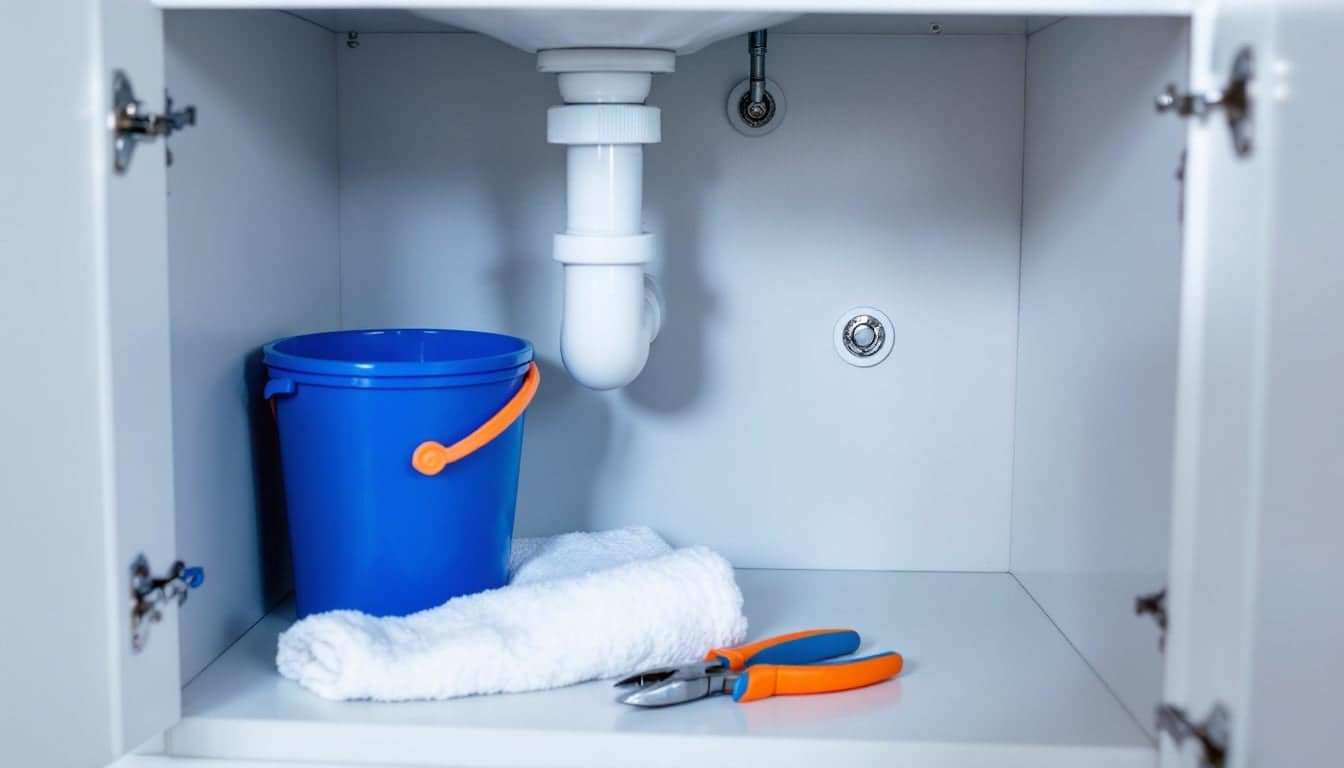
Look under any sink and you'll find a bend in the pipe. That's the P trap, and it's the most important piece of plumbing nobody thinks about until it drips, smells or cracks. Replacing one is a 30-minute job with a bucket, a plastic kit and your hands. Pliers optional, patience not.
Plastic traps last a long time. Old chrome ones rot from the inside, and plastic ones get cracked by bin lids, cleaning bottles and enthusiastic plunging. Either way, the fix is the same: take it off, measure, fit new.
What a P-trap does
The U-shaped part of the trap holds a plug of water. That water is the only thing between your kitchen and the sewer gas sitting in the drain line. Every time the sink empties, fresh water refills the U and the seal is renewed.
The trap has two parts. The J-bend is the curved section that holds the water. The trap arm is the horizontal pipe that runs from the J-bend into the wall. Turn the whole thing on its side and it looks like a P, hence the name. Somewhere behind the wall, the drain connects to a vent pipe that lets air into the system, so that water rushing down the drain doesn't suck the trap empty.
Most US codes call for a trap seal of between 2 and 4 inches (50 to 100 mm) of water. Any trap kit made for sinks gives you that, as long as you fit it the right way up.
P-trap vs S-trap
An S-trap looks similar, but instead of turning into the wall it turns down and goes through the floor. Older houses are full of them.
| P-trap | S-trap | |
|---|---|---|
| Where the drain goes | Sideways into the wall | Straight down through the floor |
| Vent | Drain is vented behind the wall | Often no proper vent |
| Risk of siphoning | Low when vented | High: the falling water drags the seal out with it |
| Allowed in new work | Yes | Not under most US codes |
| Typical sign of trouble | Rarely any | Gurgling as it drains, sewer smell afterwards |
The problem with an S-trap is physics. Water falling down the vertical leg acts like a siphon and pulls the water out of the U behind it. The sink drains, gurgles, and leaves the trap half empty or dry. Sewer gas then has a clear route into the room. That's why, in general terms, the main US plumbing codes don't allow S-traps in new installations. Existing ones are often left alone until the plumbing is altered, but rules vary by state and city.
Converting an S-trap to a P-trap isn't just a different bend. The drain has to come out of the wall at the right height and be vented, either with a vent pipe or, where local code allows, an air admittance valve. That means opening walls or floors, and it's a plumber's job.
Measuring: 1-1/4 or 1-1/2 inch?
Sink traps come in two common sizes, and the size refers to the outside diameter of the pipe.
| Fixture | Usual size | Outside diameter | Rough circumference |
|---|---|---|---|
| Bathroom sink | 1-1/4 inch | 1.25 in (32 mm) | 3.9 in (99 mm) |
| Kitchen sink | 1-1/2 inch | 1.5 in (38 mm) | 4.7 in (120 mm) |
Measure the tailpiece, the straight pipe coming down from the sink drain, not the trap itself. A tape across the pipe works if you can see both edges. Otherwise wrap a strip of paper or string around it, mark where it overlaps and measure that length against the circumference column.
Also measure the drain stub coming out of the wall. Bathroom sinks often have a 1-1/4 inch tailpiece going into a 1-1/2 inch wall drain. That's normal, and it's what the reducing washer in a trap kit is for: it lets a 1-1/2 inch trap grip a 1-1/4 inch tailpiece.
Choosing a trap kit
Plastic (PVC or polypropylene) kits are the standard choice. They don't corrode, they're forgiving to fit, and you can cut them with a hacksaw. A typical kit has a J-bend, a trap arm, two slip nuts, slip washers and a reducing washer. A 1-1/2 inch plastic P-trap kit covers most kitchen sinks and, with the reducing washer, most bathroom ones too.
Chrome-plated brass looks smarter under a wall-hung basin where the trap is on show. It's harder to fit and eventually corrodes from the inside, which is likely why you're replacing the old one.
Removing the old trap
- Clear the cupboard. Everything out. Towel on the cupboard floor, bucket under the trap.
- Undo the slip nuts. There's one where the J-bend meets the tailpiece and one where it meets the trap arm. Plastic nuts usually turn by hand. Metal ones may need groove pliers. Anticlockwise, viewed from the nut's side.
- Drop the J-bend into the bucket. It's full of water and whatever the sink has been collecting. You'll want gloves.
- Remove the trap arm. Undo the nut at the wall adapter and pull the arm out.
- Stuff a rag in the wall drain. Not all the way in. Just enough to stop sewer gas and stop a nut falling in.
- Look at what's left. Check the tailpiece for corrosion and cracks, and the wall adapter for damage. An old chrome tailpiece that crumbles when you touch it needs replacing too.
Fitting a plastic trap kit
- Dry fit everything first. Hang the J-bend on the tailpiece and slide the trap arm into the wall adapter. Don't tighten anything yet.
- Cut to length if needed. If the trap arm is too long or the tailpiece pushes the J-bend too low, mark the pipe and cut it square with a fine-tooth hacksaw. Clean off the burrs with a knife or sandpaper. Burrs catch hair and scrape washers.
- Check the fall. The trap arm should slope slightly down towards the wall, about 1/4 inch per foot (roughly 2 per cent). Never uphill. A trap arm sloping the wrong way holds dirty water like a second trap.
- Fit the nuts and washers (see below). Wall end first, then the tailpiece.
- Tighten by hand. Snug, then a quarter turn more with pliers if a joint still drips. Plastic threads strip easily, and an overtightened nut cracks or distorts the washer.
If your kitchen has a garbage disposal, the trap connects to the disposal's discharge tube instead of a tailpiece. That outlet often sits lower than a sink tailpiece, so the trap arm needs to line up with the wall drain without running uphill. And whatever the layout, one trap per sink. Two traps in a row fight each other and slow everything down.
Slip nuts and washers: which way round
Slip joints seal on the washer, not on the threads. The nut squeezes the washer into the joint. So:
- The nut goes on first, threads facing the joint.
- The washer goes on next, tapered side facing the joint, flat side facing the nut.
- No thread tape, no pipe dope, no putty. They don't help a slip joint and can stop the washer seating.
- Use new washers. Old ones are flattened into the shape of the old pipe.
The leak test
A trap that's dry after running the tap for 10 seconds hasn't really been put to work. Do this:
- Put the plug in and fill the sink most of the way.
- Pull the plug and watch the joints as the full volume rushes through.
- Wipe each joint with dry paper towel. Any damp spot on the paper means that joint needs work.
- Leave a dry sheet of paper towel on the cupboard floor under the trap and look again an hour later.
If a joint drips, undo it, check the washer is straight and tapered side towards the joint, and retighten. A slip nut that drips after tightening usually has a washer that's sitting crooked, not a nut that's too loose.
Smells from a dry trap
A sewer smell from a sink doesn't always mean a leak. The usual causes:
- The trap has dried out. A sink in a guest bathroom or a holiday home that nobody uses for weeks loses its water seal to evaporation. Run the tap for a minute every couple of weeks.
- The trap is being siphoned. Gurgling as the sink drains, or when another fixture empties, means the venting isn't doing its job. Common with S-traps. That one is for a plumber.
- The trap is dirty. A slimy build-up of hair, soap and food smells on its own. Taking the J-bend off and washing it out, as described in how to unblock a bathroom sink, sorts it.
- A joint is loose. A slip nut that doesn't leak water can still let a whiff of gas through. Check every nut is snug.
Slow draining is a separate issue, and usually a clog further down. The blocked drains guides cover what to try next. If the slow drain is a kitchen sink with a disposal, check the disposal itself before blaming the pipe; garbage disposal not working runs through that.
FAQ
How tight should a P-trap be?
Hand-tight, plus a quarter turn with pliers if needed. If you need real force to stop a drip, the washer is in the wrong way round or sitting crooked.
What if the trap won't line up with the wall drain?
If the wall drain is higher than the trap outlet, shorten the tailpiece so the trap sits higher; the trap arm must never run uphill. If the wall drain is much lower, don't let the trap arm dive down to it, because a steep drop behaves like an S-trap. A tailpiece extension lowers the whole trap instead.
Does a bathroom sink need its own trap?
Yes. Every sink, tub and shower needs a trap. Toilets have one built into the porcelain.
Tools for this job Toolbox: Taps, sinks and traps

Owen Pritchard
Owen handles everyday repairs (dripping taps, weak showers, blocked loos) and has firm views on coat hangers, caustic soda and anything sold as "flushable".
General guidance only. Gas, electrical and structural work must be done by a suitably qualified person, and rules differ from country to country.